Are your kitchen cabinet doors looking dirty and grimy? Don’t worry, you can easily clean them up with a few simple steps! In this article, we’ll show you how to gather your cleaning supplies, remove the cabinet hardware, dust and vacuum the doors, prepare a cleaning solution, and give those doors a good scrub. By following these easy instructions, you’ll have your kitchen cabinet doors looking clean and shiny in no time!
Gather Necessary Cleaning Supplies
To effectively clean your kitchen cabinet doors, you’ll need to gather up all of the necessary cleaning supplies. Having the right cleaning techniques and effective products will make the task much easier and more efficient.
First, you’ll need a mild dish soap or a specialized kitchen cabinet cleaner. These products are designed to cut through grease and grime without damaging the surface of your cabinet doors. Avoid using harsh chemicals or abrasive cleaners, as they can cause discoloration or scratches.
Next, gather a few soft microfiber cloths or sponges. These will be used to apply the cleaning solution and gently scrub away dirt. Microfiber is ideal because it is gentle on surfaces and doesn’t leave behind lint or streaks.
You may also want to have a small toothbrush or soft-bristled brush on hand. These can be used to reach into crevices and tight corners where dirt tends to accumulate.
Lastly, don’t forget to have a bucket or sink filled with warm water for rinsing and a dry cloth for drying the cabinet doors after cleaning.
Remove Cabinet Hardware
Now that you have gathered your cleaning supplies, it’s time to remove the cabinet hardware. Properly removing the hardware will ensure that you can clean the cabinet doors thoroughly and without causing any damage. Follow these steps to safely remove the knobs, handles, or hinges before proceeding with the cleaning process.
Proper Hardware Removal
Start by using a screwdriver to carefully remove the cabinet hardware. Begin by removing the hinges that attach the cabinet doors to the frame. Use the screwdriver to loosen and remove the screws holding the hinges in place. Be sure to keep track of the screws so they can be easily reinstalled later. Once the hinges have been removed, you can then focus on cleaning the knobs. Gently unscrew each knob from the cabinet door or drawer front. Use a mild detergent and warm water to clean the knobs, making sure to remove any dirt or grime. Rinse and dry the knobs thoroughly before reattaching them to the cabinet doors. Proper hardware removal is essential for effectively cleaning kitchen cabinet doors.
Cleaning Without Damage
To clean kitchen cabinet doors without causing any damage, you should continue by removing the cabinet hardware. This step is crucial to ensure that you can thoroughly clean the doors and prevent any harm to the hardware itself. Start by unscrewing any knobs, handles, or pulls from the cabinet doors using a screwdriver or a drill, depending on the type of hardware. Place the screws in a small container or baggie to keep them organized and prevent them from getting lost. Once the hardware is removed, you can clean the doors more effectively, reaching all the nooks and crannies. Remember to handle the hardware with care to avoid scratching or damaging it. By removing the cabinet hardware before cleaning, you can maintain the integrity of your kitchen cabinets and ensure they look their best.
Dust And/Or Vacuum Cabinet Doors
To remove dust and dirt from your kitchen cabinet doors, simply use a soft cloth or a vacuum cleaner with a brush attachment. Cleaning kitchen cabinets is an essential part of maintaining a clean and organized kitchen. Dust and dirt can accumulate on cabinet doors over time, making them look dull and unattractive. Regular dusting or vacuuming can help keep your cabinet doors looking their best.
Start by using a soft cloth to gently wipe away any loose dust or dirt from the surface of the cabinet doors. Make sure to pay attention to the corners and edges where dust tends to accumulate. For a more thorough cleaning, you can use a vacuum cleaner with a brush attachment. This will help remove any stubborn dust particles that may have settled into the crevices of the doors.
When using a vacuum cleaner, be sure to set it to a low suction setting to prevent any damage to the cabinet doors. Move the brush attachment gently across the surface of the doors, paying special attention to any areas that appear particularly dusty. Take your time and go over the doors multiple times if necessary to ensure a thorough cleaning.
Prepare Cleaning Solution
Now that you have dusted and/or vacuumed your cabinet doors, it’s time to prepare the cleaning solution. Proper cleaning techniques are essential to ensure effective removal of dirt and grime. Choosing the right products that are safe for your specific cabinet material is crucial. Additionally, learning time-saving cleaning hacks can make the task more efficient and convenient.
Proper Cleaning Techniques
Once you have gathered your cleaning supplies, begin by mixing a cleaning solution using a subordinating conjunction. A common mistake when cleaning kitchen cabinet doors is using harsh chemicals that can damage the finish. Instead, opt for a gentle yet effective cleaning method. One option is to mix equal parts of warm water and mild dish soap. This solution is safe for most cabinet materials and will effectively remove grease and grime. Another effective cleaning method is using a vinegar and water solution. Mix one part vinegar with two parts water to create a natural and non-toxic cleaner. Vinegar has antibacterial properties and can help eliminate odors. Remember to always test the cleaning solution on a small, inconspicuous area before applying it to the entire cabinet door.
Choosing the Right Products
To properly clean your kitchen cabinet doors, continue the discussion on proper cleaning techniques by preparing the right cleaning solution. Choosing the right products is essential to ensure effective cleaning. When selecting cleaners, it is important to consider their effectiveness and whether they are eco-friendly. Look for cleaners that are specifically designed for kitchen cabinets and are effective in removing grease, grime, and fingerprints. Avoid using harsh chemicals or abrasive cleaners, as they can damage the surface of your cabinet doors. Instead, opt for eco-friendly cleaning options such as vinegar and water solution or a mild dish soap diluted in water. These natural cleaners are gentle on the cabinet doors while still effectively removing dirt and stains. By choosing the right products, you can clean your kitchen cabinet doors effectively and safely.
Time-Saving Cleaning Hacks
To save time while cleaning your kitchen cabinet doors, you can easily prepare a cleaning solution using common household products. Here are four quick cleaning methods and natural cleaning alternatives you can try:
- Vinegar and Water Solution: Mix equal parts of white vinegar and water in a spray bottle. This solution helps remove grease and grime from cabinet doors.
- Baking Soda Paste: Make a paste by mixing baking soda with water. Apply the paste to stubborn stains or sticky residue, then scrub gently with a soft cloth or sponge.
- Lemon Juice and Olive Oil: Combine equal parts of lemon juice and olive oil to create a natural cleaning solution. This mixture works well for removing dirt and adding shine to wooden cabinet doors.
- Dish Soap and Warm Water: Mix a few drops of dish soap with warm water. Use a sponge or microfiber cloth to wipe down cabinet doors, eliminating fingerprints and grease.
These time-saving cleaning hacks using natural cleaning alternatives will leave your kitchen cabinet doors looking fresh and clean in no time.
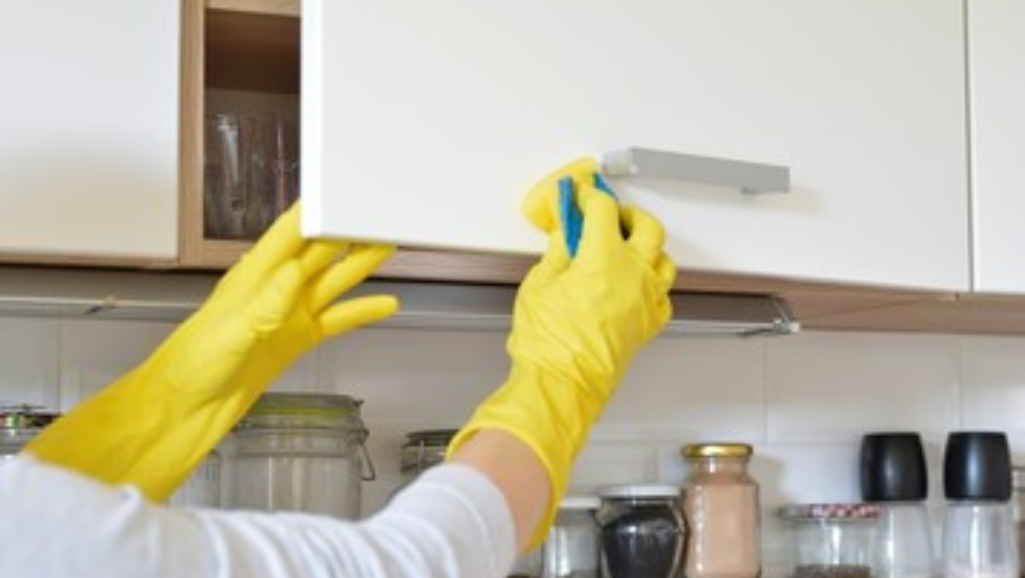
Clean Cabinet Doors
Start by wiping down the cabinet doors with a damp cloth to remove any surface dust or dirt. This simple step is the foundation for clean and sparkling cabinet doors. Once you have wiped down the doors, it’s time to tackle any stubborn stains or grime. For tough stains, create a mixture of warm water and mild dish soap. Dip a sponge or soft cloth into the soapy water and gently scrub the stained area. Be sure to rinse the sponge or cloth frequently to avoid spreading the dirt. If you’re dealing with greasy residue, a mixture of vinegar and water can do wonders. Spray the solution onto the cabinet doors and let it sit for a few minutes before wiping it away. Another time-saving hack is to use a microfiber cloth for cleaning. These cloths are highly effective at trapping dirt and dust, making the cleaning process quicker and more efficient. Remember to dry the cabinet doors thoroughly to prevent water spots or streaks. With these cleaning techniques and time-saving hacks, your cabinet doors will be looking brand new in no time.
Dry and Reassemble Cabinet Doors
Now, it’s time to dry the cabinet doors and reassemble them. Follow these steps to ensure that your cabinet doors are properly dried and rehydrated to prevent warping:
- Remove excess moisture: After cleaning the cabinet doors, use a clean and dry cloth to remove any remaining moisture. Make sure to thoroughly dry all surfaces, including the edges and corners.
- Allow air circulation: To speed up the drying process, open windows and doors in the kitchen to promote airflow. You can also use fans or dehumidifiers to remove any excess moisture from the air.
- Rehydrate the wood: If you notice any signs of dryness or cracking on the cabinet doors, consider rehydrating the wood. Apply a wood conditioner or furniture oil according to the manufacturer’s instructions. This will help restore moisture and prevent further damage.
- Reassemble with care: Once the cabinet doors are completely dry and rehydrated, carefully reattach them to the cabinets. Use a screwdriver to secure the hinges and ensure that the doors are properly aligned. Take your time to avoid any accidental damage or misalignment.


