This step-by-step guide on how to install glass in cabinet doors. By following these instructions, you’ll be able to transform your kitchen or storage space with ease. Say goodbye to outdated, solid doors and hello to a sleek and modern design. With just a few tools and some careful measurements, you’ll have beautiful glass doors that will make a lasting impression. Let’s get started!
Understanding the Anatomy of Glass Cabinet Doors
To understand how to install glass in cabinet doors, you need to know the anatomy of glass cabinet doors. Glass cabinet doors have a center panel made of glass and a four-sided frame. Some doors have individual glass sections called lites. The glass pane is attached using silicone, wood trim, or Hafele stops. French four-lite doors give the appearance of four sections but only require one piece of glass. Knowing different glass cutting techniques can be helpful when installing glass in cabinet doors. There are also various styles of glass door hardware available for customization. Advantages of glass cabinet doors include adding visual interest and allowing you to showcase your dishes or collectibles. Glass cleaning and maintenance is important to keep the doors looking their best and free from fingerprints and smudges.
Choosing the Right Method and Materials
Determining the method and materials for glass installation is essential when updating your cabinet doors. To start, let’s look at some DIY glass installation tips. There are different methods you can choose from, each with its own pros and cons. Silicone bonding is a straightforward approach that requires basic tools like a tape measure, screwdriver, and caulking gun. When it comes to choosing the right glass thickness, consider factors such as durability and aesthetics. Avoid common mistakes like not measuring accurately or mishandling the glass to prevent scratches. Lastly, enhance the visual appeal of your glass cabinet doors by exploring decorative options such as frosted or textured glass patterns. With these tips in mind, you’ll be able to successfully install glass in your cabinet doors and transform the look of your kitchen.
Removing the Cabinet Doors Safely
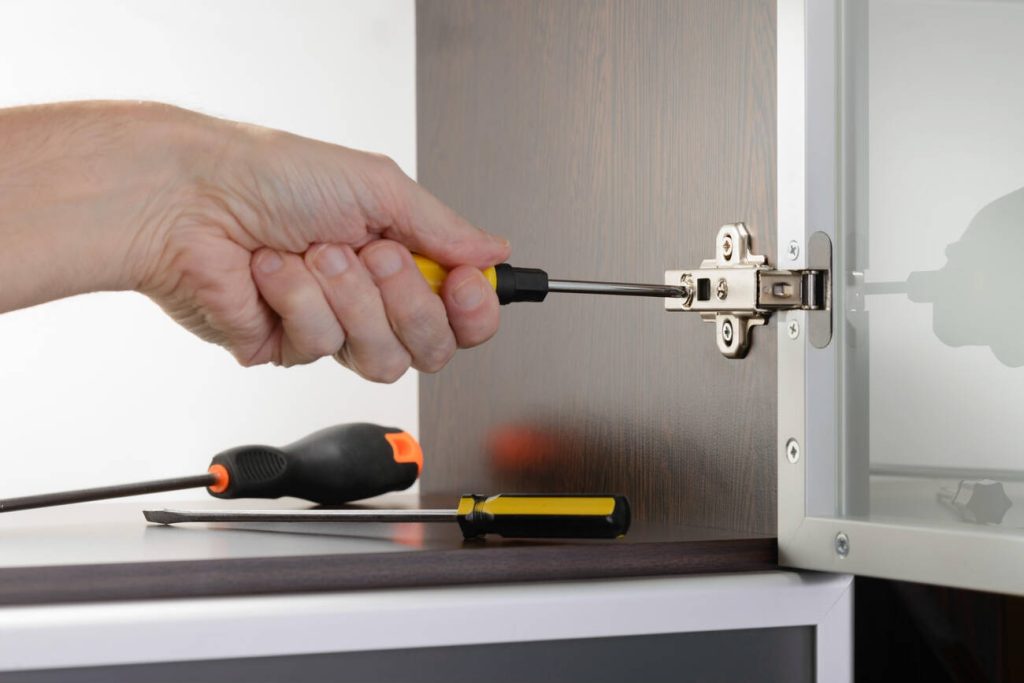
Using a screwdriver, unscrew the hinges from the door and safely place the screws in a designated area. Here are some safety precautions to follow when removing cabinet doors:
- Carefully remove the old cabinet doors to avoid any injuries.
- Take extra care to protect the hardware, such as knobs or handles, by placing them in a safe location.
- When handling glass cabinet doors, be mindful of their fragile nature and handle them with caution.
- Before proceeding with any further steps, measure the size of the glass panel needed for your cabinet doors.
In addition to glass panels, there are alternative materials you can consider for your cabinet doors such as wood or acrylic. By following these safety precautions and properly removing the door hinges, you can ensure a smooth transition during your glass installation process while protecting both yourself and your hardware.
Measuring Your Cabinet Doors for Glass Installation
When measuring for glass installation, be sure to place the cabinet doors on a blanket and measure the length and width of the opening from the inside edge. This will ensure accurate measurements for ordering or cutting your glass panel. Consider the thickness of the glass when selecting materials, as it can affect both the appearance and functionality of your cabinet doors. You have two options: DIY or hiring a professional. If you choose to go DIY, make sure you have all the necessary tools and materials on hand, such as safety glasses, a tape measure, and silicone sealant. Alternatively, you can explore alternative materials like acrylic or textured glass for added design flair. Don’t forget about decorative options like frosted or etched glass if you want to enhance privacy while still allowing light in. Lastly, remember to clean and maintain your glass cabinet doors regularly using non-abrasive cleaners to keep them looking their best.
Cutting the Glass Panel With Precision
To ensure precise cuts, carefully mark the measurements onto the back of the glass panel before using a straightedge and glass cutter. Follow these cutting techniques for installing glass in cabinet doors:
- Choose precision tools: Use a high-quality glass cutter to ensure clean and accurate cuts.
- Consider glass thickness: Depending on your preference and cabinet design, select an appropriate thickness for the glass panel.
- Explore DIY options: If you have experience cutting glass, you can cut it yourself following proper safety precautions.
- Professional installation: Alternatively, if you’re not confident in your abilities or prefer a hassle-free option, consider hiring a professional to cut and install the glass.
Professional Glass Cutting Services: A Viable Option
Now that you know the basics of cutting glass panels, let’s discuss the advantages of professional glass cutting services. While DIY glass cutting can save you money, it requires precision and skill to achieve the desired results. Professional glass cutters have years of experience and specialized tools to ensure accurate cuts. They understand different glass cutting techniques for various types of projects, which can be challenging for beginners.
One advantage of professional cutting is the quality of workmanship. They have access to state-of-the-art equipment, resulting in clean and precise cuts that fit perfectly into your cabinet doors. Moreover, they can provide custom shapes and designs that may not be achievable with DIY methods.
Although professional glass cutting services come at a cost, it is often worth it for complex or intricate projects where accuracy is crucial. If you decide to hire a professional, make sure to do your research and find reputable glass cutting services in your area. Look for reviews and recommendations from previous customers to ensure you are getting high-quality service and value for your money.
Handling and Preparing the Glass for Installation
Once you have measured and cut the glass panel, handle it with care to avoid any scratches before proceeding with the installation. Here are some tips to help you handle and prepare the glass for installation:
- Cleaning Techniques: Before handling the glass, make sure to clean your hands thoroughly to remove any dirt or oils that may transfer onto the glass surface.
- Preventing Scratches: Place a soft towel or blanket on a flat surface and set the glass panel on top of it. This will provide a cushioning effect and prevent scratches while you work.
- Glass Door Styles: Consider different styles of glass doors such as center panel doors, lites, or French four-lite doors to add a touch of elegance to your cabinets.
- Glass Thickness Options and Alternative Materials: Choose the appropriate thickness of glass for your cabinet doors based on durability and aesthetic preferences. Additionally, consider alternative materials like acrylic or polycarbonate if you’re looking for lightweight options.
Step-by-Step Guide to Installing Glass in Cabinet Doors
After measuring and cutting the glass panel, handle it with care to avoid any scratches before proceeding with installation. Once you have prepared the glass, it’s time to install it in your cabinet doors. Follow these steps for a successful installation:
- Remove the old cabinet doors and hardware.
- Measure the length and width of the opening in the cabinet door.
- Cut the glass panel to fit the door opening or have it cut by a professional.
- Prepare the door by applying silicone around the inside edge of the opening.
- Install the glass pane into the edges, wiping away any excess silicone.
- Allow the silicone to dry completely.
Ensuring a Secure Fit: Applying Silicone Sealant
To ensure a secure fit, apply silicone sealant around the inside edge of the door opening. This step is crucial in preventing glass slippage and sealing the edges securely. By applying silicone evenly, you can avoid air bubbles and ensure long-lasting adhesion of the glass panel. Here’s how to do it:
- Clean the inside edge of the door opening thoroughly to remove any dirt or debris.
- Cut a small hole at the tip of the silicone tube and insert it into a caulking gun.
- Squeeze a thin, even bead of silicone along the entire inside edge of the door opening.
- Use your finger or a tool to smooth and level out the silicone, ensuring complete coverage.
Removing Excess Silicone and Allowing for Drying
Be sure to carefully wipe away any excess silicone and allow it to dry completely before moving on to the next step. Removing excess silicone is important to ensure a clean and professional-looking installation of glass in cabinet doors. Use a squeegee or a clean cloth to gently remove any excess silicone, making sure not to leave behind any residue. This step is crucial in preventing air bubbles from forming between the glass and the door frame. Additionally, consider alternative adhesives if silicone is not your preferred choice. However, keep in mind that different adhesives may have different drying time considerations, so be sure to read and follow the manufacturer’s instructions carefully. Lastly, for proper cleaning and maintenance, use mild soap and water solution to clean the glass regularly, avoiding harsh chemicals that could damage the surface.
Reattaching Cabinet Doors and Hardware
Once you have finished attaching the glass pane, it is time to reattach your cabinet doors and hardware. Here are the steps to follow:
- Reattaching Cabinet Doors:
- Align the hinges on the door with the hinge plates on the cabinet frame.
- Use a screwdriver to secure the hinges in place.
- Ensure that the doors are level and flush with each other and adjust as needed.
- Tighten all screws securely.
- Hardware Installation:
- Place knobs or handles in your desired location on each door.
- Mark where the screws will go with a pencil.
- Use a screwdriver or drill to attach the hardware firmly.
- Door Alignment:
- Check that all doors open and close smoothly without rubbing against each other or the frame.
- Adjust hinge screws if necessary to achieve proper alignment.
- Knob Placement:
- Ensure that knobs or handles are centered vertically and horizontally on each door for a balanced look.
Maintenance Tips for Glass Cabinet Doors
Regular cleaning and proper handling are essential for maintaining the appearance and longevity of glass panel kitchen cabinet doors. To keep your glass doors looking their best, follow these cleaning techniques:
- Use a mild glass cleaner or a mixture of vinegar and water to clean the glass surface.
- Avoid using abrasive cleaners or scrub brushes that can scratch the glass.
- Gently wipe the glass with a soft cloth or sponge in circular motions.
- Dry the glass thoroughly with a lint-free towel to prevent streaks.
Preventing scratches on your glass doors is crucial. Place felt pads on the corners of the frame where the door closes to prevent metal-on-glass contact. When choosing the right type of glass for your cabinet doors, consider tempered or laminated options for added durability and safety.
Alternatively, you can explore alternative materials such as acrylic or textured glass if you prefer something different from traditional clear glass.
When it comes to installation, you have two options: DIY or professional installation. While DIY may save money, professional installation ensures precise measurements and expert handling of fragile materials like glass.
Consider these factors before making your decision.


