If you want to upgrade the look of your kitchen cabinets, one option is to transform grooved doors into solid face doors. This article will guide you through the process step by step, providing you with the tools and materials needed and explaining how to remove the existing grooved doors. You’ll learn how to prepare the solid face material and attach it to the cabinet doors, and we’ll give you some finishing touches to complete the project. Let’s get started!
Tools and Materials Needed
To make solid face kitchen cabinet doors from grooved doors, you will need several tools and materials. First and foremost, you need to choose the right type of wood for your solid face cabinet doors. Oak, maple, and cherry are popular choices due to their durability and aesthetic appeal. Ensure that the wood is of high quality and free from any defects or imperfections.
In addition to the wood, you will need a few essential tools. A table saw will be crucial for cutting the wood to the desired size and shape. A router with a straight bit is necessary for removing the grooves from the doors and creating a smooth surface. A sander will help you achieve a seamless finish by eliminating any rough edges or unevenness.
To achieve a professional finish, follow these tips. Before applying any paint or stain, ensure that the wood is properly sanded and free from dust. Apply a primer to seal the wood and prevent any bleed-through. When painting, use thin coats and allow sufficient drying time between each layer. For a stained finish, apply the stain evenly and wipe off any excess. Finally, apply a clear coat to protect the wood and add a glossy finish.
Removing the Existing Grooved Doors
Start by taking off the existing grooved doors using a screwdriver. Carefully remove all the screws that are holding the doors in place. Make sure to keep the screws in a safe place, as you will need them later when installing the alternative door options.
Once the screws are removed, gently pull the doors away from the cabinet frame. Be cautious not to damage the surrounding areas or the hinges. If the doors are stuck, you may need to use a small pry bar to loosen them.
After removing the grooved doors, assess their condition. If they are still in good shape, you can consider fixing damaged cabinet doors rather than replacing them entirely. Minor scratches or dents can be repaired using wood filler and sanding. For more extensive damage, you may need to replace specific sections of the door or even the entire panel.
Remember to take accurate measurements of the removed doors, as these will be crucial when crafting the new solid face kitchen cabinet doors. Now that you have successfully removed the grooved doors, you can move on to the next step of creating beautiful, custom-made cabinet doors for your kitchen.
Preparing the Solid Face Material
After removing the grooved doors, you will need to gather the necessary materials to prepare the solid face material for your new kitchen cabinet doors. The first step is choosing the right wood for your project. Look for a high-quality, durable wood that matches the aesthetic of your kitchen. Popular options include oak, maple, and cherry. Once you have chosen the wood, it’s time to measure and cut the material. Start by measuring the dimensions of the cabinet opening and add an additional 1 inch to each side to account for the door overlay. Using a table saw, carefully cut the wood to the desired size. Make sure to use safety precautions such as wearing safety goggles and using a push stick to guide the wood through the saw. Take your time and make precise cuts to ensure a perfect fit. Once you have cut all the pieces, sand them down to smooth out any rough edges or imperfections. This will ensure a professional-looking finish when the doors are installed. By carefully choosing the right wood and accurately measuring and cutting the material, you are well on your way to creating beautiful solid face kitchen cabinet doors.
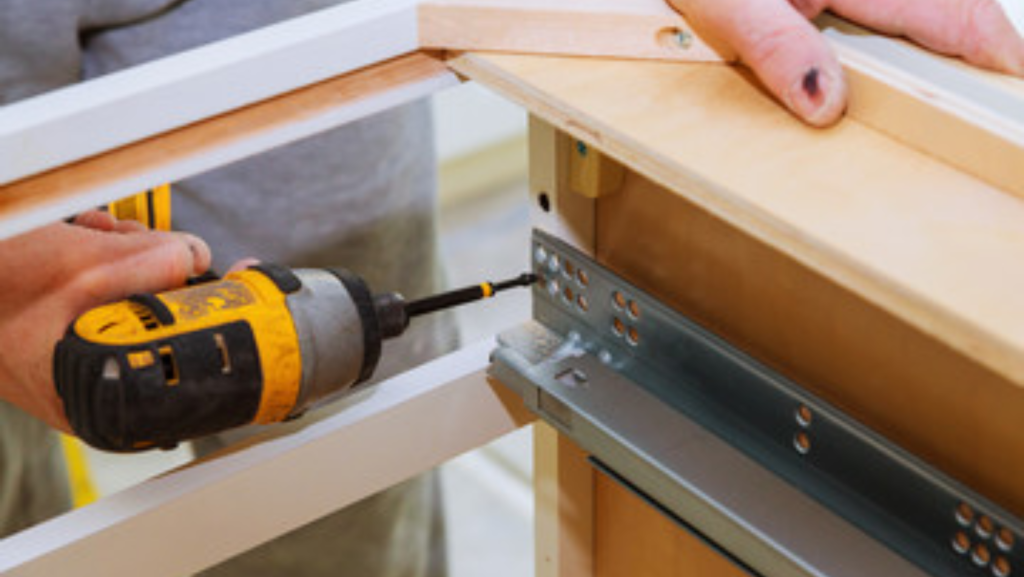
Attaching the Solid Face Material to the Cabinet Doors
Attach the solid face material to the cabinet doors by screwing it into place using a power drill. Before attaching the material, make sure it is properly sanded to achieve a smooth and even surface. Use a fine-grit sandpaper and sand in the direction of the grain to avoid any scratches or damage. Take your time and sand the material thoroughly, paying attention to any rough spots or imperfections.
When it comes to choosing the adhesive for attaching the solid face material, it is important to select the right one for a strong and long-lasting bond. Consider using a high-quality wood glue that is specifically designed for woodworking projects. This type of adhesive will provide a strong bond and ensure that the solid face material stays securely in place.
To help you visualize the process of attaching the solid face material to the cabinet doors, refer to the table below:
| Step | Description |
|---|---|
| 1 | Prepare the solid face material by sanding it with a fine-grit sandpaper. |
| 2 | Apply a thin and even layer of wood glue to the back of the solid face material. |
| 3 | Carefully align the material with the cabinet door and press it firmly into place. |
| 4 | Secure the material by screwing it into the cabinet door using a power drill. |
Finishing Touches and Final Steps
To complete the transformation of your kitchen cabinet doors, focus on adding the finishing touches and completing the final steps of the process. After attaching the solid face material to the doors, it’s important to ensure that the surfaces are smooth and ready for painting. Begin by performing a final sanding to remove any imperfections and create a smooth and even surface. Use a fine-grit sandpaper and sand in the direction of the wood grain to avoid any scratches or marks.
Once the doors are sanded, it’s time to apply the final coat of paint. Choose a high-quality paint that is specifically designed for kitchen cabinets to ensure durability and a professional finish. Before painting, make sure to clean the surfaces thoroughly to remove any dust or debris. Apply the paint evenly using a brush or roller, following the manufacturer’s instructions for drying times between coats.
After the final coat of paint has dried, inspect the doors for any touch-ups that may be needed. Use a small brush to fix any areas where the paint may have dripped or where the coverage is uneven. Finally, step back and admire your newly transformed kitchen cabinet doors. The finishing touches and attention to detail will enhance the overall appearance of your kitchen and give it a fresh and updated look.


