Are your kitchen cabinet doors looking dull and worn out? It’s time to give them a fresh new look with a coat of paint! In this step-by-step guide, we’ll walk you through the process of painting your kitchen cabinet doors. From gathering supplies to applying primer and adding those finishing touches, we’ve got you covered. Get ready to transform your kitchen with a simple and cost-effective DIY project. Let’s dive in and get those cabinet doors looking brand new again!
Gathering Supplies
To begin painting your kitchen cabinet doors, you’ll need to gather all of the necessary supplies. The first step is choosing the right paint for the job. Look for paint specifically designed for cabinets, as these are more durable and resistant to moisture and grease. Opt for a semi-gloss or high-gloss finish for easy cleaning.
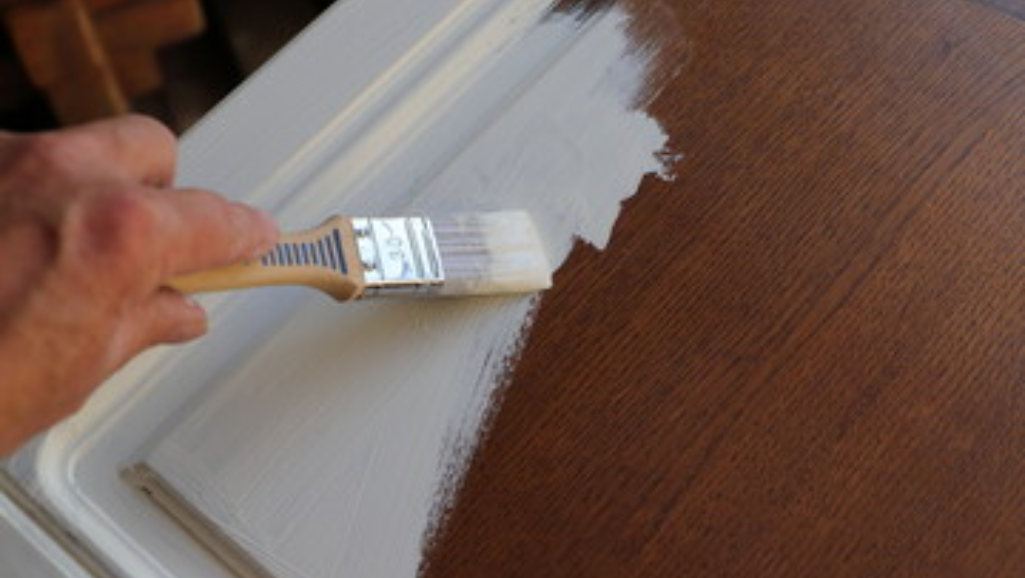
Next, you’ll need to gather the proper brushes for the project. A high-quality synthetic bristle brush is ideal for painting cabinet doors. Look for a brush with a medium-sized width, around 2-3 inches. This size allows for better control and precision when applying the paint.
Additionally, consider using a foam roller for larger, flat surfaces, such as the cabinet doors themselves. A foam roller will help you achieve a smooth and even finish, without any brush strokes.
When it comes to proper brush techniques, start by applying paint in long, even strokes along the grain of the wood. Avoid using too much pressure, as this can lead to drips and uneven coverage. Work in small sections, and make sure to blend the edges to avoid visible brush marks.
Preparing the Cabinet Doors
Start by removing all hardware from the cabinet doors, such as handles and hinges. This will make the painting process much easier and ensure a smooth and even finish. Once the hardware is removed, you can move on to preparing the cabinet doors for painting.
- Sanding Technique:
- Use a medium-grit sandpaper to gently sand the surface of the cabinet doors. This will help to remove any rough patches or imperfections and create a smooth surface for the paint to adhere to.
- Pay special attention to any areas that have chipped or peeling paint. Use a finer-grit sandpaper to smooth out these areas and feather the edges to create a seamless transition between the old and new paint.
- After sanding, wipe down the doors with a tack cloth to remove any dust or debris.
- Cleaning Methods:
- Before painting, it’s important to clean the cabinet doors thoroughly. Use a mild detergent mixed with warm water to remove any grease or grime.
- Scrub the doors gently with a sponge or soft cloth, paying attention to any stubborn stains.
- Rinse the doors with clean water and allow them to dry completely before moving on to the next step.
Applying Primer
After preparing the cabinet doors, you can now apply a primer to ensure a smooth and durable paint finish. Choosing the right primer is essential for achieving the best results. Look for a primer specifically designed for kitchen cabinets, as it will provide excellent adhesion and durability. Additionally, opt for a primer that matches the type of paint you intend to use, whether it’s oil-based or water-based.
Before applying the primer, make sure to clean the cabinet doors thoroughly. Remove any dust, grease, or debris using a mild detergent and warm water. Once the doors are clean and dry, you can start applying the primer.
Here are some tips for a smooth primer application:
- Use a high-quality paintbrush or foam roller to apply the primer evenly. Ensure that you cover all areas, including the edges and corners.
- Apply the primer in thin, even layers. Avoid applying it too thickly, as it may cause drips or uneven drying.
- Allow the primer to dry completely before applying the paint. This may take a few hours, depending on the type of primer and the temperature and humidity in your kitchen.
Painting the Cabinet Doors
Once the primer has dried completely, you can now paint the cabinet doors for a fresh new look. Before you start painting, make sure you have chosen the right color for your kitchen cabinets. Consider the overall color scheme of your kitchen and choose a color that complements it. It’s always a good idea to test the color on a small inconspicuous area of the cabinet door to ensure you’re happy with the result.
Now, let’s get started with the painting process. Here’s a step-by-step guide to help you achieve a professional-looking finish:
- Begin by stirring the paint thoroughly to ensure an even consistency. Pour a small amount of paint into a paint tray or container.
- Using a high-quality brush or a foam roller, apply the paint evenly on the cabinet doors. Start from the edges and work your way towards the center, using long, smooth strokes. Be careful not to apply too much paint at once to avoid drips and runs.
- Allow the first coat of paint to dry completely before applying a second coat. This will ensure a smooth and durable finish. Check the drying time specified by the paint manufacturer and follow their recommendations.
Remember to paint both sides of the cabinet doors for a consistent look. Once you’ve finished painting, allow the doors to dry completely before reattaching them to the cabinets. This will prevent any smudges or damage to the freshly painted surface.
With these steps, you can transform the look of your kitchen cabinets with a fresh coat of paint.
Finishing Touches
To achieve a polished look, apply a protective topcoat to the painted cabinet doors. This final step not only adds a layer of protection but also enhances the overall appearance of your kitchen cabinets. Before applying the topcoat, make sure the paint color on the cabinet doors is completely dry. Use a high-quality brush to minimize brush strokes and ensure a smooth finish. Here is a helpful table to guide you through the process:
| Step | Instructions |
|---|---|
| 1 | Stir the topcoat thoroughly to ensure an even consistency. |
| 2 | Dip the brush into the topcoat, allowing the excess to drip off. |
| 3 | Apply a thin, even coat of topcoat to the cabinet doors, working in the direction of the wood grain. |
| 4 | Allow the topcoat to dry according to the manufacturer’s instructions. |


