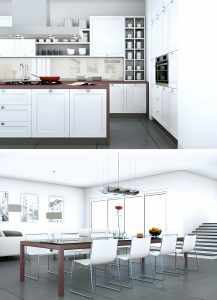
If you think replacing your kitchen cabinet doors with glass sounds like a daunting task, think again! In this article, we’ll show you how easy it can be to transform your cabinets and give your kitchen a fresh new look. By following our step-by-step instructions, you’ll learn how to measure and mark the doors, cut out the panels, and install beautiful glass inserts. Don’t worry about the cost or difficulty – we’ve got you covered with budget-friendly options and helpful tips along the way. Get ready to bring some sparkle into your kitchen!
Preparing for the Project
To prepare for the project, remove the cabinet doors and label them with painter’s tape, then place the existing hardware in a plastic bag. This will help you keep track of which door goes where when it’s time to reassemble everything. Next, you’ll need to measure the dimensions of the doors and determine the size of glass panels you’ll need. Use measuring techniques like a tape measure or ruler to ensure accuracy. Once you have your measurements, you can use glass cutting tools to cut the glass panels to size. Be sure to follow safety precautions when using these tools. Finally, it’s time for glass panel installation. Apply adhesive or silicone sealant around the edges of the door frame and carefully insert the glass panel into place. Allow it to dry before reattaching the doors with their hardware.
Measuring and Marking the Doors
Remove the doors from the cabinet and measure the width and depth of the groove on the inside. This will help you determine the size of glass panels you need for your replacement cabinet doors. When it comes to glass panel thickness options, consider going for a thicker panel as it will be more durable and less prone to breakage. As for cutting the glass, there are different types of glass cutters available in the market. Research and choose one that suits your needs best. While DIY glass cutting can save you money, it also has its pros and cons. It gives you control over customization but requires precision and skill. Make sure to choose the right silicone sealant for attaching the glass panels to your cabinet doors. Finally, when removing old glass and putty, be cautious and use appropriate tools like a flathead screwdriver or chisel to avoid damage.
Cutting Out Panels
After adjusting the circular saw cutting depth, carefully cut along the marked lines to remove the excess wood from the cabinet doors. This step is crucial in preparing your cabinet doors for the glass inserts. Once you have cut out the panels, it’s time to consider glass cutting techniques and explore different types of glass for your cabinet doors. There are various options available such as rainy glass, seeded glass, transparent glass, leaded glass, and frosted glass. Each type offers unique design possibilities and can enhance the overall look of your kitchen. Before deciding on DIY installation, it’s important to weigh the pros and cons. While DIY can be cost-effective, it requires precision and skill to ensure a professional finish. If you’re feeling creative, you can also experiment with creative designs for your glass cabinet doors to add a personal touch to your kitchen decor. However, if you’re looking for cost-effective alternatives to traditional glass inserts, there are options like acrylic or LEXAN that offer durability at a lower price point.
Installing the Glass Inserts
Once you have cut out the panels, it’s important to carefully install the glass inserts into your cabinet doors. Adding glass inserts to your kitchen cabinet doors comes with several benefits. Firstly, they make the kitchen appear larger and enhance natural light transfer, brightening up the room. Additionally, glass inserts add design and variety to your kitchen decor. If you prefer privacy, frosted or textured glass can hide the contents of your cabinets, preventing them from becoming cluttered. There are various types of glass inserts available for kitchen cabinet doors, such as rainy glass, seeded glass, transparent glass, leaded glass, and frosted glass. Replacing your cabinet doors with these stylish inserts can help revitalize the look of your space and increase its value. Factors that affect the cost include DIY versus professional installation and the type of material chosen for the inserts. Before buying inserts, consider your budget and measure each cabinet separately to ensure a proper fit.
The Anatomy of Glass Doors
Glass kitchen cabinet doors consist of a center panel of glass and a four-sided frame. These doors offer various advantages, such as making the kitchen appear larger, enhancing natural light transfer, adding design variety, and keeping cabinets organized. There are different types of glass inserts available for these doors, including rainy glass with a unique pattern, seeded glass with seed-like bubbles, transparent glass for showcasing cutlery and kitchenware, leaded glass for creating intricate patterns, and frosted glass for hiding cabinet contents while brightening up the space. The cost of glass cabinet doors can be affected by factors like DIY versus professional installation, the chosen material for the inserts, budget-friendly options available in the market, and the cost of supplies. Before buying glass inserts, it is important to consider your budget, measure your cabinets separately to determine how much glass is needed, choose a style that suits your preferences and research thoroughly to make an informed decision.
Selecting Method and Preparing Materials
Now that you understand the anatomy of glass doors, let’s dive into the next step: selecting the method and preparing materials for replacing your kitchen cabinet doors with glass inserts. This is an exciting phase as you start envisioning the transformation of your kitchen space. Here are a few things to consider:
- Cost Considerations: DIY using current cabinets and tools can save money, but also take into account the cost of supplies and glass inserts.
- Benefits of Glass Inserts: They make your kitchen appear larger, enhance natural light, add design variety, and prevent clutter in your cabinets.
- Types of Glass Inserts: Choose from rainy glass for a unique pattern, seeded glass for privacy, transparent glass to showcase cutlery, leaded glass for elegant patterns, or frosted glass to hide contents while brightening up the space.
- Reasons to Replace Cabinet Doors: Revitalize the look of your kitchen, create a modern feel, increase home value, make the room appear bigger and brighter.
When it comes to purchasing high-quality glass inserts at affordable prices, consider checking out Glass Genius – an online marketplace trusted by many. So get ready to transform your kitchen with stunning glass cabinet doors!
Steps to Install Glass in Cabinet Doors
After measuring the length and width of the opening in the cabinet door, you can cut the glass panel to fit using a glass cutter or have it cut at a hardware store or glass supplier. Installing glass inserts in your kitchen cabinet doors has several benefits. Glass inserts make your kitchen appear larger and brighter by enhancing the transfer of natural light. They also add design and variety to your kitchen, with options like rainy glass, seeded glass, transparent glass, leaded glass, and frosted glass. Frosted or textured glass can hide the contents of your cabinets, preventing them from becoming cluttered. When considering replacing your cabinet doors with glass inserts, there are cost considerations to keep in mind. DIY installation using existing cabinets and tools can save money, as well as choosing budget-friendly options for the glass inserts themselves. However, professional installation may provide a more seamless result if you prefer not to tackle this project yourself.
Preparing the Door
To prepare the door for installation, make sure to remove any old glass and debris from the cabinet. This will ensure a clean surface for the new glass. Here are some steps to follow:
- Removing hardware: Take off any screws or hinges that are attached to the door.
- Cleaning the door: Wipe down the door with a damp cloth to remove any dirt or dust.
- Applying silicone sealant: Use a caulking gun to apply a thin layer of silicone around the inside edge of the opening.
- Aligning the glass: Carefully place the glass panel into the opening, making sure it lines up with the edges.
After you have aligned the glass, press it firmly into place so it adheres to the silicone sealant. Allow for drying time before rehanging the door.
